By Evan ThornePublished: November 3, 2025Updated: May 28, 2026
Parallax error is the single most frustrating calibration issue on pen display tablets. You place the stylus tip exactly where you want the line to start, but the digital ink lands slightly offset. Over long inking sessions, even a two-millimeter drift compounds into imprecise strokes, misaligned panels, and unnecessary undo commands. The root cause is not the pen itself. It is the angular mismatch between your eye position, the surface glass, and the sensor layer beneath the screen.
Most artists assume factory calibration is sufficient. In practice, it is only a baseline. Every desk height, monitor arm position, and chair adjustment changes your viewing angle. That angle changes where the cursor appears relative to the pen tip. If you calibrate once and never revisit the settings, the error creeps back within weeks.
Why Parallax Happens on Pen Displays
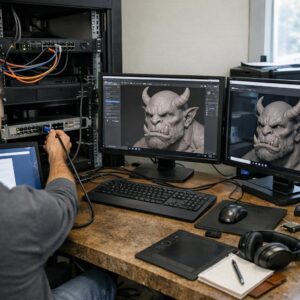
Pen display tablets use electromagnetic digitizers embedded behind the LCD panel. The sensor detects the pen position through the glass, but the image you see is on the surface of that glass. Because the sensor and the visual surface are not in the same physical plane, any viewing angle other than perfectly perpendicular creates a perceived offset. The thicker the glass, the larger the potential error.
Standalone drawing tablets without a display avoid this entirely because there is no screen to misalign. Once you add a monitor, the physics of refraction and viewing angle become unavoidable. Manufacturers compensate with factory calibration matrices, but those matrices assume a standard eye position that rarely matches your actual setup.
Preparing Your Workspace Before Calibration
Calibration should happen in the same physical conditions you use for actual work. If you calibrate sitting upright and then ink while leaning back, the offset returns. Start by setting your chair and desk to their normal working positions. Place the pen display at the angle you prefer, typically between 15 and 30 degrees from horizontal. Ensure the surface is stable and does not flex when you press.
Lighting matters. Glare on the glass can make you tilt your head unconsciously, which shifts your eye position and invalidates the calibration. Position lights so they do not reflect directly into your eyes. If you use a monitor arm, lock it in place. Any wobble during calibration introduces inconsistency.
Using the Built-In Calibration Tool
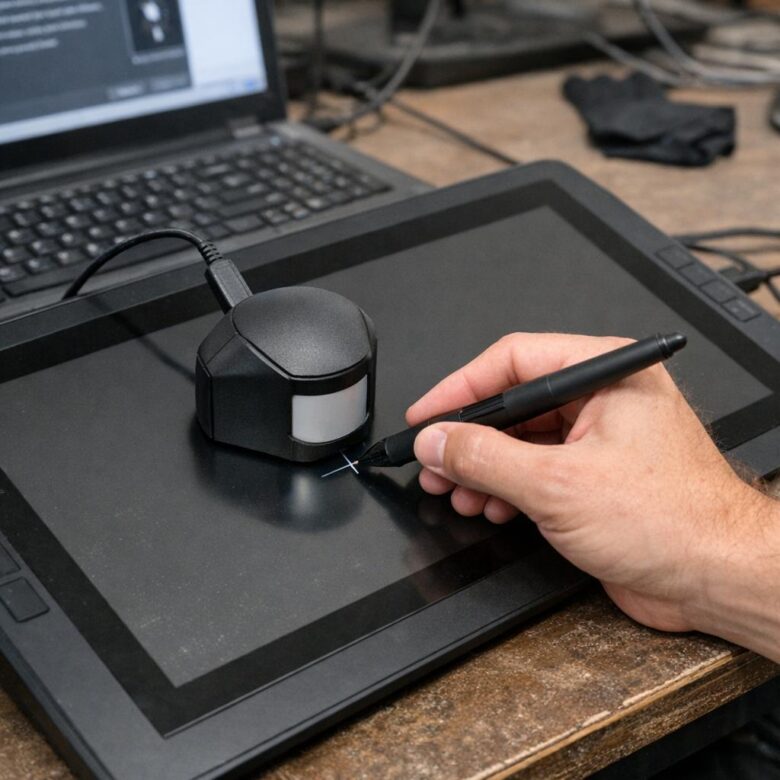
Every major pen display manufacturer includes a calibration utility. Wacom calls it Wacom Tablet Properties under the Calibrate tab. Huion and XP-Pen include similar tools in their driver control panels. The process is straightforward: the software displays a crosshair on the screen, you tap the center with your pen, and it records the offset between the sensor reading and the visual target.
Do not rush through the default nine-point grid. Tap each target deliberately, holding the pen at the exact angle you use for drawing. Do not hover and tap from above. Do not calibrate with your non-dominant hand. The software averages your inputs, so sloppy targets produce a sloppy matrix.
After the first pass, test the result. Open a blank canvas and draw slow diagonal lines from corner to corner. Watch whether the cursor leads or trails the tip. If the offset is consistent in one direction, recalibrate with that awareness. Some drivers allow manual offset adjustments in millimeters, which is useful when the automatic grid is close but not perfect.
Accounting for Viewing Angle and Eye Position
Standard calibration assumes you are looking straight at the center of the screen. If you are taller, shorter, or sit off-center, the perpendicular assumption fails. The most reliable fix is to calibrate from your actual working posture. Some artists even close one eye during calibration to eliminate binocular disparity, though this is optional.
If your pen display supports multiple calibration profiles, create one for seated work and another for standing desk use. The vertical shift between those positions is enough to change the parallax offset by several millimeters at the edges of the screen. Switching profiles takes seconds and saves repeated frustration.
Edge Correction and Screen Curvature
Parallax is usually worst at the screen edges because the viewing angle is most oblique there. Center calibration may feel accurate while corner targets drift. Some drivers offer edge compensation or edge calibration modes. Use them if available. They add extra sample points near the bezel and weight the matrix toward those regions.
Curved pen displays introduce additional complexity. The curve changes the glass thickness relative to your eye across the horizontal axis. Calibration on a curved screen requires more sample points and often benefits from a second pass focused specifically on the left and right extremes. If your driver does not support this, manual offset entry becomes more important.
Verifying Pressure and Tilt After Calibration
Calibration affects position, not pressure or tilt. However, artists often conflate the two. After fixing parallax, test whether your brush dynamics still feel correct. Open a pressure-sensitive brush and draw a gradient from light to heavy. If the transition feels abrupt, check the pressure curve in the driver. Calibration should not change it, but driver updates sometimes reset both settings together.
Tilt recognition depends on the pen angle remaining consistent. If you changed your grip or tablet angle during calibration, tilt values may shift. Verify by holding the pen at a known angle and observing whether the cursor tilts correctly in software. Misaligned tilt combined with fixed parallax is a sign that the pen is not perpendicular to the sensor plane.
When to Recalibrate
Recalibrate after any physical change to your setup. New monitor arm, different chair, added laptop stand, or even a desk mat that raises your elbow height all alter your eye position. Seasonal changes matter too. In winter you may wear thicker clothing that changes your shoulder position. In summer, a fan or air conditioning may make you sit differently.
As a rule, recalibrate every four to six weeks even if nothing changed. Driver updates sometimes reset calibration matrices without warning. A quick recalibration takes under two minutes and prevents a full day of imprecise inking.
Summary
- Parallax is caused by the physical separation between the sensor layer and the visual surface, magnified by viewing angle.
- Calibrate in your actual working posture, not an idealized position.
- Use the full target grid deliberately. Speed reduces accuracy.
- Test with slow diagonal lines immediately after calibration.
- Create multiple profiles if you switch between sitting and standing.
- Pay extra attention to edges and curved screens.
- Recalibrate regularly and after any physical setup change.
Consistent calibration is not a one-time fix. It is a maintenance habit, like cleaning your desk or organizing your brush presets. The time invested pays back in fewer undo commands, faster line confidence, and cleaner digital ink.
If you are managing large animation projects that require team collaboration on shared assets, setting up a reliable storage infrastructure is equally critical. Our guide on configuring network attached storage for simultaneous multi-animator access covers how to configure network storage that keeps project files accessible without bottlenecks.